
A Strategic Roadmap Turning a Medical Device Concept into a Prototype
Medical device innovation is rarely a linear path. It is a complex dance between regulatory compliance, technical feasibility, and clinical reality. According to recent industry analyses, over 70% of early-stage device concepts fail to reach the market due to inadequate early-stage validation or misaligned engineering strategies. This statistic highlights a critical truth: the gap between a rough idea and a viable prototype is not just about drawing schematics. It is about building a rigorous framework that satisfies both engineers and regulators from day one. At A65 Consulting, we have helped clients develop products that contributed to more than $300M of projected new product revenue. This guide outlines the precise engineering phases required to transform your concept into a tangible, testable prototype. (Contact A65 Consulting)
1. Defining the Problem and Clinical Need
Before a single line of code is written or a CAD model is drafted, you must establish the foundational requirements. User Needs Analysis is the process of documenting exactly what the device must do, who will use it, and in what environment. This phase is not optional. It is the bedrock of your Design History File (DHF). (Medical Device Design Consulting)
Many startups skip this step, jumping straight to solutioning. This is a costly error. If you do not define the problem clearly, your prototype will likely solve the wrong issue. We recommend conducting interviews with clinicians, patients, and payers. This data drives your Design Inputs, which are the specific, measurable requirements that your device must meet.
For example, if you are designing a wearable monitor, the input might be "battery life must exceed 24 hours under continuous use." Without this clarity, your engineering team cannot make informed material or component choices. This phase ensures that your prototype is built to validate a real clinical hypothesis, not just an engineering curiosity.
2. Concept Generation and Feasibility
Once the needs are defined, the next step is Concept Generation. This involves brainstorming multiple potential solutions. At this stage, speed is more important than perfection. You are looking for viable pathways, not the final product.
We utilize a structured approach to evaluate these concepts. Each idea is scored against criteria such as technical risk, regulatory pathway, and manufacturing complexity. This is where Design for Manufacturing (DFM) begins to play a role. Even in the concept phase, you must ask: Can this be made? If a design requires a manufacturing process that is prohibitively expensive or unavailable, it must be discarded early.
A65 Consulting emphasizes that Design for Manufacturing is a quality exercise, not just a cost exercise. By considering manufacturing constraints early, you avoid costly redesigns later. This phase often results in a Concept Proof-of-Concept (PoC), a rough model that validates the core functionality without worrying about aesthetics or durability.
3. Detailed Design and Engineering
With a selected concept, you move into Detailed Design. This is where the abstract becomes concrete. Your engineering team creates detailed CAD models, selects materials, and defines tolerances. This phase is heavily documented to support future regulatory submissions.
Key activities in this phase include:
- System Architecture: Defining how hardware, software, and mechanical components interact.
- Material Selection: Choosing biocompatible materials that meet regulatory standards like ISO 10993.
- Risk Analysis: Conducting a preliminary FMEA (Failure Mode and Effects Analysis) to identify potential risks.
This phase is iterative. As you design, you will uncover new constraints. For instance, a sensor might be too large for the intended housing, requiring a redesign of the mechanical structure. Verification is a system, not a phase, meaning you must constantly check your design against your initial requirements.
4. Prototyping Phases: Alpha to Beta
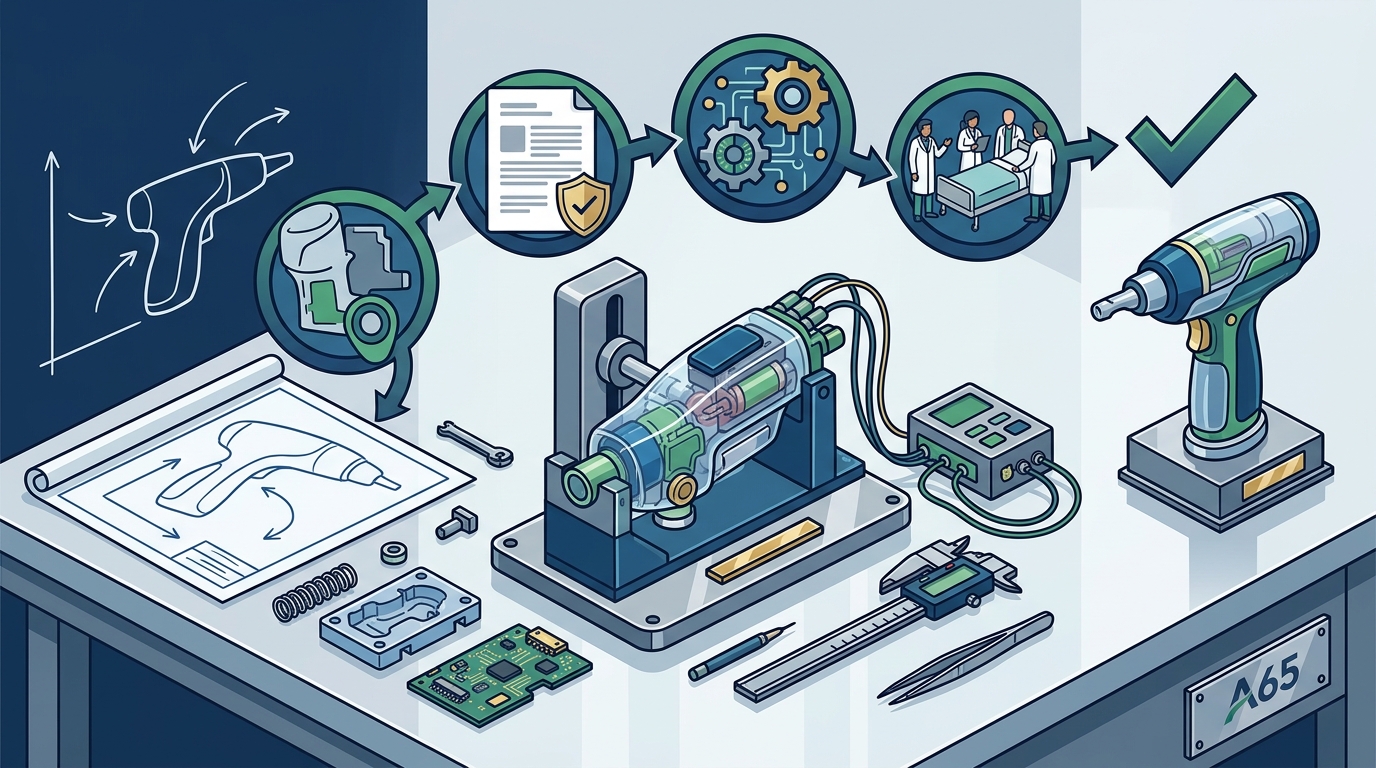
Prototyping is not a single event. It is a series of evolving models, each serving a specific purpose. Understanding the difference between these phases is critical for budgeting and timeline management.
Alpha Prototypes (Engineering Validation Test - EVT)
Alpha prototypes are built to test functionality. They are often rough, using 3D printing or off-the-shelf components. The goal is to answer: Does it work? These prototypes are used for internal testing and early feedback. They are not intended for clinical use or regulatory submission.
Beta Prototypes (Design Validation Test - DVT)
Beta prototypes are closer to the final product. They use production-intent materials and manufacturing processes. The goal is to answer: Is it reliable? These prototypes undergo rigorous testing, including environmental stress, usability testing, and biocompatibility testing. This is the phase where most design changes occur, as real-world usage reveals flaws that lab tests missed.
Pilot Production Prototypes (PVT)
Pilot prototypes are built using the final manufacturing line. They validate that the product can be made consistently at scale. This phase is crucial for Design Transfer, the process of moving from development to manufacturing.
5. Verification and Regulatory Alignment
The final step before full-scale production is Verification and Validation. Verification confirms that the device meets the design inputs. Validation confirms that the device meets the user needs.
This phase is heavily regulated. For FDA-cleared devices, you must prepare a 510(k) submission or a PMA (Pre-Market Approval) package. This requires extensive documentation, including test reports, risk analyses, and clinical data. Human Factors testing is also critical to ensure that users can operate the device safely and effectively.
At A65 Consulting, we help clients navigate this complex landscape. Our team has experience with more than 10 FDA 510k submissions. We ensure that your prototype is not just a working model, but a regulatory-ready asset.
Key Takeaways
- Start with Requirements: Clear user needs prevent costly redesigns later in the process.
- Iterate Early: Use low-fidelity prototypes to test core functionality before investing in high-fidelity models.
- Consider Manufacturing Early: Design for Manufacturing reduces risk and cost.
- Document Everything: Your Design History File is as important as the device itself.
- Validate with Users: Human Factors testing ensures clinical usability.
- Plan for Regulatory Submission: Align your testing strategy with FDA or EU MDR requirements from the start.
- Partner with Experts: Working with a firm like A65 Consulting can accelerate your timeline and reduce risk.
Frequently Asked Questions
How long does it take to turn a medical device concept into a prototype?
The timeline varies significantly based on complexity. A simple mechanical device might take 3-6 months for an Alpha prototype. A complex software-hardware integrated device can take 12-18 months or more for a Beta prototype. Factors include regulatory requirements, material availability, and testing complexity.
What is the difference between an Alpha and Beta prototype?
An Alpha prototype is built for functional testing and uses non-production materials. A Beta prototype is built for validation and uses production-intent materials and processes. Alpha answers "Does it work?" Beta answers "Is it reliable?"
Do I need a patent before building a prototype?
It is highly recommended to file a provisional patent before public disclosure or detailed prototyping. However, you can build prototypes internally without public disclosure. A65 Consulting can help you assess your intellectual property strategy during the concept phase.
How much does it cost to develop a medical device prototype?
Costs vary widely. A simple 3D printed prototype might cost a few thousand dollars. A complex Beta prototype with custom tooling and biocompatibility testing can cost $100,000 or more. A65 Consulting typically charges on a monthly retainer basis, working toward mutually agreed on project milestones.
Can I use off-the-shelf components in my prototype?
Yes, off-the-shelf components are often used in Alpha prototypes to save time and cost. However, for Beta prototypes and production, you must ensure that these components are available in sufficient quantities and meet regulatory standards.
What is Design for Manufacturing (DFM)?
Design for Manufacturing is the practice of designing products in a way that makes them easy and cost-effective to manufacture. It involves considering tolerances, material properties, and assembly processes early in the design phase.
How does A65 Consulting help with prototyping?
A65 Consulting provides end-to-end engineering support, from concept generation to design transfer. We help clients navigate regulatory requirements, manage risk, and ensure that their prototypes are built to meet both clinical and engineering standards.
Next Steps
Turning a medical device concept into a prototype is a journey that requires precision, expertise, and strategic planning. At A65 Consulting, we are your partner in this journey. We have decades of experience in medical device innovation and product development. We thrive in the stress of program management and delivering results.
Do not let your idea stall in the concept phase. Contact us today to request a proposal and learn more about how we can help you achieve your product development objectives. Schedule a discovery call with our team to discuss your project.