
A medical device prototype is more than a model that looks like the final product. It is a controlled engineering tool used to answer specific questions: Does the device perform its intended function? Can users operate it safely? Are the materials and components appropriate? Can the design eventually be manufactured, tested, and submitted for regulatory review?
The most reliable path from concept to prototype begins before detailed CAD, supplier sourcing, or 3D printing. It starts by defining the intended use, translating clinical needs into measurable requirements, identifying foreseeable risks, and choosing prototype builds that generate meaningful evidence. For U.S. projects, the device’s intended use and indications for use influence its FDA classification and regulatory pathway. FDA groups devices into Class I, Class II, and Class III according to risk and applicable regulatory controls; many non-exempt Class I and Class II devices use a 510(k) pathway, while Class III devices generally require premarket approval unless another pathway applies. ([fda.gov](https://www.fda.gov/medical-devices/overview-device-regulation/classify-your-medical-device?utm_source=openai))
This guide explains how to turn a medical device concept into a prototype through a disciplined sequence of engineering decisions. If you need support with concept development, product architecture, risk management, or manufacturing transfer, contact A65 Consulting to discuss your project.
1. Start with the patient, user, and clinical problem
The first prototype decision is not which material to use or which 3D printer to select. It is deciding exactly what problem the device must solve and for whom.
Document the intended patient population, primary users, use environment, clinical workflow, duration of use, contact with the body, and consequences of device failure. A device used by a trained clinician in an operating room has different requirements from a home-use device operated by a patient with limited training. A disposable device, an implant, a diagnostic instrument, and a powered therapeutic system also create very different engineering and regulatory challenges.
Questions to answer before designing
- What clinical or patient need is the device addressing?
- Who will use, clean, maintain, calibrate, or dispose of it?
- Where will it be used, and under what environmental conditions?
- What must the device do, and what must it never do?
- Does it contact tissue, blood, skin, medication, or other biological materials?
- What happens if the device is used incorrectly or stops working?
- What existing devices, procedures, or technologies serve as comparators?
This early definition prevents a common development mistake: building a technically impressive prototype that does not fit the real clinical workflow.
2. Translate the idea into measurable design requirements
A concept becomes engineerable when its goals are expressed as design inputs. Instead of writing that a device should be “easy to use,” define measurable criteria such as setup time, allowable force, maximum number of steps, user training assumptions, connection requirements, or error-proofing expectations.
Requirements should address performance, safety, materials, reliability, usability, packaging, sterilization, software, electrical characteristics, manufacturing, and regulatory expectations as applicable. FDA design-control guidance identifies design inputs as including user and patient needs, intended use, performance, safety, biocompatibility, electromagnetic compatibility, reliability, human factors, labeling, packaging, sterility, manufacturing processes, and risk analysis. ([fda.gov](https://www.fda.gov/medical-devices/investigational-device-exemption-ide/ide-related-topics?utm_source=openai))
Example: converting a vague goal into a requirement
| Concept statement | Engineering requirement |
|---|---|
| The device should deliver medication consistently. | The device shall deliver the specified dose within a defined accuracy range across the intended temperature, orientation, storage, and operating conditions. |
| The device should be comfortable. | The device shall remain within defined dimensional, pressure, weight, and surface-finish limits during the specified wear period. |
| The device should be intuitive. | Representative intended users shall complete critical tasks without an unmitigated use error under defined simulated-use conditions. |
Each requirement should have a verification method, such as inspection, analysis, bench testing, software testing, usability evaluation, or review of objective evidence. This creates a traceable connection between the original concept, the prototype, and later design verification.
3. Establish the regulatory pathway and risk framework early
Regulatory planning should begin during concept development rather than after the prototype is complete. In the United States, classification depends substantially on intended use, indications for use, and the level of risk associated with the device. FDA’s classification resources can help identify the product code, classification, exemptions, and potential submission route. ([fda.gov](https://www.fda.gov/medical-devices/overview-device-regulation/classify-your-medical-device?utm_source=openai))
Regulatory planning does not mean every prototype must be built exactly like the final commercial device. It does mean that the team should understand which design decisions may affect future evidence. For example, changing the patient-contacting material, sterilization method, software architecture, energy source, or intended user can alter testing and documentation needs.
Use risk management to guide prototype decisions
Risk analysis is most useful when it changes the design. Apply a structured process to identify hazards, hazardous situations, foreseeable misuse, potential harms, and risk controls. ISO 14971:2019 describes a medical device risk-management process covering hazard identification, risk estimation and evaluation, risk control, and monitoring of control effectiveness throughout the device life cycle. ([iso.org](https://www.iso.org/standard/72704.html?utm_source=openai))
Practical tools may include a preliminary hazard analysis, fault-tree analysis, failure modes and effects analysis, use-related risk analysis, and requirements-to-risk traceability. If a critical risk can be reduced through a mechanical interlock, software limit, alarm, material change, or ergonomic improvement, that design control is usually more effective than relying only on warnings or training.
4. Build the preliminary design architecture
Once requirements and risks are defined, develop the system architecture. Break the product into functions and subsystems: enclosure, mechanism, sensors, electronics, software, power, fluid path, patient interface, packaging, accessories, and manufacturing processes.
At this stage, the objective is not to finalize every dimension. The objective is to compare feasible solutions and expose high-risk assumptions. A design review should evaluate function, safety, manufacturability, cost, supply availability, serviceability, and testability.
Choose materials and technologies with the final product in mind
Prototype materials are often selected for speed, but they should not conceal important product risks. A printed polymer may be suitable for evaluating hand position or enclosure size but unsuitable for assessing sealing, fatigue, sterilization, chemical compatibility, or patient contact. Likewise, an off-the-shelf electronic board may demonstrate a sensing concept without representing the thermal, electromagnetic, cybersecurity, or production constraints of the final system.
Use design-for-manufacturing and design-for-assembly reviews early. DFM is not only a cost-reduction exercise. It can improve quality by reducing part count, simplifying assembly, controlling tolerances, preventing incorrect assembly, and enabling repeatable inspection.
5. Build an alpha prototype to answer the highest-risk questions
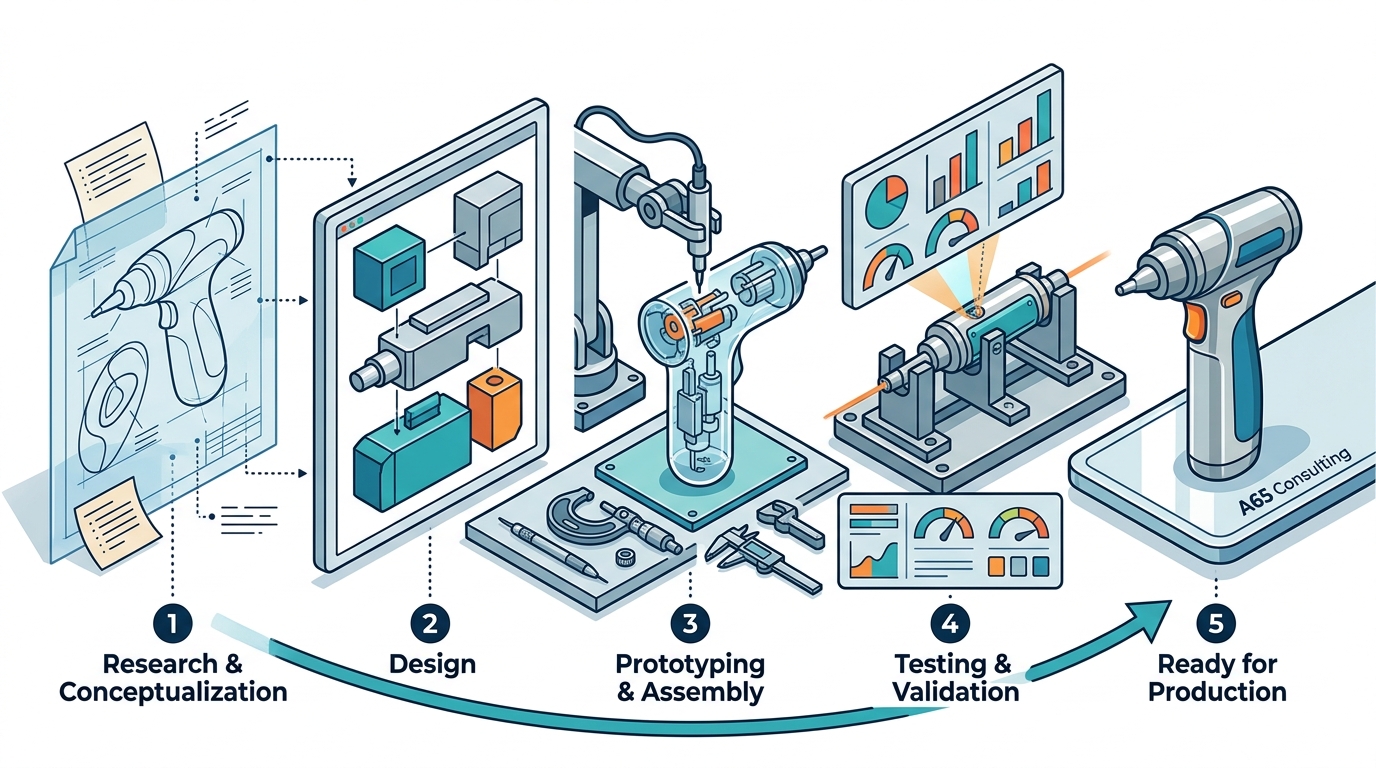
An alpha prototype is typically a functional proof of concept. It may use 3D-printed parts, CNC-machined components, evaluation electronics, laboratory fixtures, or manually assembled subcomponents. Its value comes from the evidence it produces, not from its cosmetic resemblance to the finished device.
Before building, create a prototype test plan. List the assumptions the build must evaluate, the test setup, acceptance criteria, data to collect, and decisions that will follow from each result.
Typical alpha prototype objectives
- Demonstrate the primary mechanism or energy transfer.
- Confirm that the device can produce the required output.
- Evaluate critical dimensions, forces, travel, flow, pressure, torque, or timing.
- Identify interference, leakage, overheating, instability, or excessive wear.
- Test worst-case operating conditions and foreseeable misuse.
- Determine whether a sensor, actuator, algorithm, or control strategy is viable.
- Generate information needed to refine the risk analysis and requirements.
Use a build-test-learn cycle. When a prototype fails, document the failure mode, identify the root cause, update the design, and repeat the test. Verification should be treated as an integrated engineering activity rather than a final event. FDA design-control materials recognize that verification may occur at multiple stages and levels of design, while validation addresses whether the device meets defined user needs and intended uses. ([fda.gov](https://www.fda.gov/medical-devices/investigational-device-exemption-ide/ide-related-topics?utm_source=openai))
6. Develop a beta prototype for realistic use and evaluation
A beta prototype should more closely represent the intended production design. It generally uses production-intent materials, representative components, controlled processes, and a configuration stable enough for meaningful usability, reliability, and pre-verification testing.
The transition from alpha to beta is not simply a cosmetic upgrade. It is a shift from asking “Can this concept work?” to asking “Can this design work repeatedly, safely, and in the hands of intended users?”
Include human factors engineering
Human factors applies to every part of the user interface, including controls, displays, connections, packaging, labeling, setup, cleaning, maintenance, and training. FDA states that the central objective of human factors and usability engineering for medical devices is to minimize use-related risks and confirm that users can operate the device safely and effectively. ([fda.gov](https://www.fda.gov/medical-devices/device-advice-comprehensive-regulatory-assistance/human-factors-and-medical-devices?utm_source=openai))
Conduct formative evaluations with representative users as soon as the design is realistic enough to reveal meaningful interaction problems. Observe users rather than relying only on interviews. Look for skipped steps, incorrect connections, awkward grips, misunderstood alarms, poor visibility, excessive force, and workarounds. Use the findings to modify the device and update the use-related risk analysis.
Address patient contact, sterilization, and packaging
If the device contacts a patient, identify the contact type and duration, then evaluate material selection and biocompatibility implications. If the device is sterile or must be sterilized, the beta configuration should be compatible with the intended sterilization method and packaging system. Sterilization can affect material strength, dimensional stability, adhesives, electronics, coatings, and packaging seals, so these issues should be evaluated before formal testing.
7. Prepare for design verification and manufacturing transfer
A prototype is not ready for commercialization merely because it works once. The team must establish objective evidence that the approved design meets its design inputs and that the final configuration is suitable for its intended users and use environments.
Plan verification before testing begins
Verification protocols should define the sample configuration, equipment, test method, environmental conditions, acceptance criteria, statistical rationale when appropriate, and data-recording requirements. Potential test categories include mechanical strength, fatigue, performance, electrical safety, electromagnetic compatibility, software, environmental exposure, packaging integrity, reliability, biocompatibility, sterilization compatibility, and transportation simulation.
FDA design-control inspection objectives emphasize established design inputs and outputs, predetermined acceptance criteria, design verification, design validation using production units or equivalent devices, risk analysis, design reviews, controlled changes, and correct design transfer. ([fda.gov](https://www.fda.gov/media/73166/download?utm_source=openai))
Make the design transferable to production
Before manufacturing transfer, finalize or mature the bill of materials, drawings, specifications, tolerances, inspection methods, assembly instructions, supplier requirements, and test fixtures. Confirm that critical suppliers can provide consistent materials and components. Evaluate whether the prototype process is hiding production problems, such as hand-fitting, excessive rework, difficult adhesive application, unavailable components, or uncontrolled tolerances.
A65 Consulting supports medical device teams across concept development, mechanical and systems engineering, manufacturing transfer, design-for-manufacturing reviews, cost optimization, quality considerations, and interim engineering leadership. This end-to-end perspective helps connect the prototype to the product that must eventually be manufactured, documented, tested, and supported.
How long does medical device prototyping take?
There is no universal schedule. A simple, low-risk mechanical concept may reach an initial proof of concept in a few months, while a connected, sterile, implantable, diagnostic, or combination product can require substantially longer development. The original project estimate for a typical alpha prototype was approximately 3–6 months, with a full beta prototype and verification cycle potentially extending to 12–18 months. Treat these figures as planning ranges rather than guarantees because complexity, testing, supplier lead times, regulatory strategy, clinical input, software content, and design changes can materially affect the schedule.
The fastest responsible teams do not skip planning. They identify the highest-risk assumptions, test them early, and avoid investing heavily in low-risk cosmetic details before core feasibility is demonstrated.
What does it cost to prototype a medical device?
Prototype cost depends on the device’s complexity and the evidence required. Cost drivers can include engineering labor, industrial design, software, electronics, tooling, specialized materials, machining, molds, fixtures, test equipment, laboratory testing, biocompatibility, sterilization, packaging, usability studies, supplier development, and regulatory documentation.
Ask prospective engineering partners to separate discovery, design, prototype fabrication, testing, and manufacturing-transfer activities. A milestone-based plan or monthly retainer can provide flexibility, but the engagement should still identify deliverables, assumptions, decision gates, and out-of-scope work. A65 Consulting offers flexible support models designed to supplement internal teams and align engineering work with project milestones.
Common mistakes that delay a medical device prototype
- Starting with appearance instead of function: A polished enclosure cannot compensate for an unproven mechanism.
- Leaving intended use undefined: Ambiguous claims can affect classification, testing, labeling, and design requirements.
- Delaying risk analysis: Late risk discovery often forces major architectural changes.
- Using nonrepresentative materials too long: Early materials may hide biocompatibility, sterilization, sealing, fatigue, or manufacturability issues.
- Testing without acceptance criteria: A test result is difficult to interpret when success was never defined.
- Ignoring users until late development: Human factors problems can require extensive redesign when discovered after the design is mature.
- Confusing verification with validation: Showing that a component meets a specification is different from showing that the finished device meets user needs and intended use.
- Underestimating manufacturing: A prototype assembled by an expert may be impossible to build consistently at production volume.
Key takeaways
- Define the clinical problem, intended use, users, and use environment before committing to detailed design.
- Convert goals into measurable requirements with planned verification methods.
- Identify the likely FDA classification and regulatory pathway early, recognizing that classification depends on intended use and risk.
- Use risk management as an engineering input that actively changes the design.
- Build alpha prototypes to answer high-risk feasibility questions, not to win a beauty contest.
- Move to production-intent beta prototypes before relying on results for usability, sterilization, reliability, or manufacturing decisions.
- Include representative users and human factors engineering throughout development.
- Plan verification, documentation, supplier readiness, and manufacturing transfer before the prototype is considered complete.
- Use an experienced medical device engineering partner when your team needs specialized expertise, additional capacity, or a path from concept through production.
Frequently asked questions
What is the first step in turning a medical device concept into a prototype?
Start by documenting the clinical problem, intended use, target users, use environment, patient contact, key performance goals, and foreseeable hazards. This information creates the foundation for requirements, risk management, regulatory planning, and prototype testing.
What is the difference between an alpha and beta medical device prototype?
An alpha prototype is an early functional build used to test core feasibility and resolve major technical unknowns. It may use rapid prototyping methods and nonproduction materials. A beta prototype is closer to the intended final design and typically uses production-intent materials, components, and processes for more realistic usability, reliability, and verification work.
Does regulatory compliance matter during the prototype stage?
Yes. Regulatory considerations should influence intended use, design inputs, risk controls, material selection, labeling assumptions, usability planning, and test strategy from the beginning. The prototype itself may not be the final submission configuration, but decisions made during prototyping can determine the evidence needed later.
How does risk analysis improve a prototype?
Risk analysis identifies hazards and foreseeable failure modes while design changes are still relatively easy to make. It can lead to safer mechanisms, interlocks, alarms, software limits, material changes, improved instructions, or other controls before the design becomes expensive to revise.
When should human factors testing begin?
Formative human factors evaluations can begin once the prototype is realistic enough to expose user-interface and workflow problems. Formal validation planning generally requires a representative device, representative users, representative tasks, and a use environment that supports meaningful conclusions about safe and effective operation. FDA recommends a risk-based approach to determine the appropriate human factors information for a marketing submission. ([fda.gov](https://www.fda.gov/medical-devices/human-factors-and-medical-devices/human-factors-premarket-information-device-design-and-documentation-processes?utm_source=openai))
Can a medical device prototype be outsourced?
Yes. Outsourcing can provide specialized mechanical, systems, electrical, software, manufacturing, quality, human factors, or regulatory expertise. The strongest external partners work within a documented development process, protect intellectual property, communicate risks clearly, and provide deliverables that integrate with the client’s quality and regulatory records.
How can A65 Consulting help with medical device prototyping?
A65 Consulting provides end-to-end medical device design, consulting, and engineering support. The team can help translate a concept into requirements, develop product architecture, perform risk-informed design, build and evaluate prototypes, improve manufacturability, support verification, and prepare the design for manufacturing transfer. A65 Consulting has also contributed to more than eight FDA 510(k) submissions and reports helping clients generate more than $300 million in projected new product revenue.
What should I bring to an initial engineering consultation?
Bring any available sketches, clinical observations, user feedback, competitive products, intended-use language, performance targets, patents or prior-art research, test data, budget assumptions, timeline goals, and known regulatory questions. Even incomplete information is useful if the uncertainties are clearly identified.
Ready to move from concept to prototype?
Turning a medical device idea into a prototype requires coordinated decisions across clinical needs, mechanical and systems engineering, risk management, human factors, regulatory strategy, testing, and manufacturing. The right prototype is not simply something you can demonstrate; it is a deliberate source of evidence that helps your team make the next development decision with confidence.
Contact A65 Consulting to discuss your medical device concept and identify the next practical step toward a functional, testable, and production-ready design.